Sunday, June 30, 2019

Shoe Last Modification Technique

Everyone has there own "best way" this is the way I like to do it.

Toe modification is common, I use leather, the sides are real easy this way too.

Make one last Perfect then go after the the other, there is no point of doing them together until you are good at it or it is a simple change.

I start with skiving leather strips and gluing them onto the last.

The 5 in 1 is quick and easy
Soak in water for a minute

Fit and form


Gorilla glue, staple stretch, and hammer

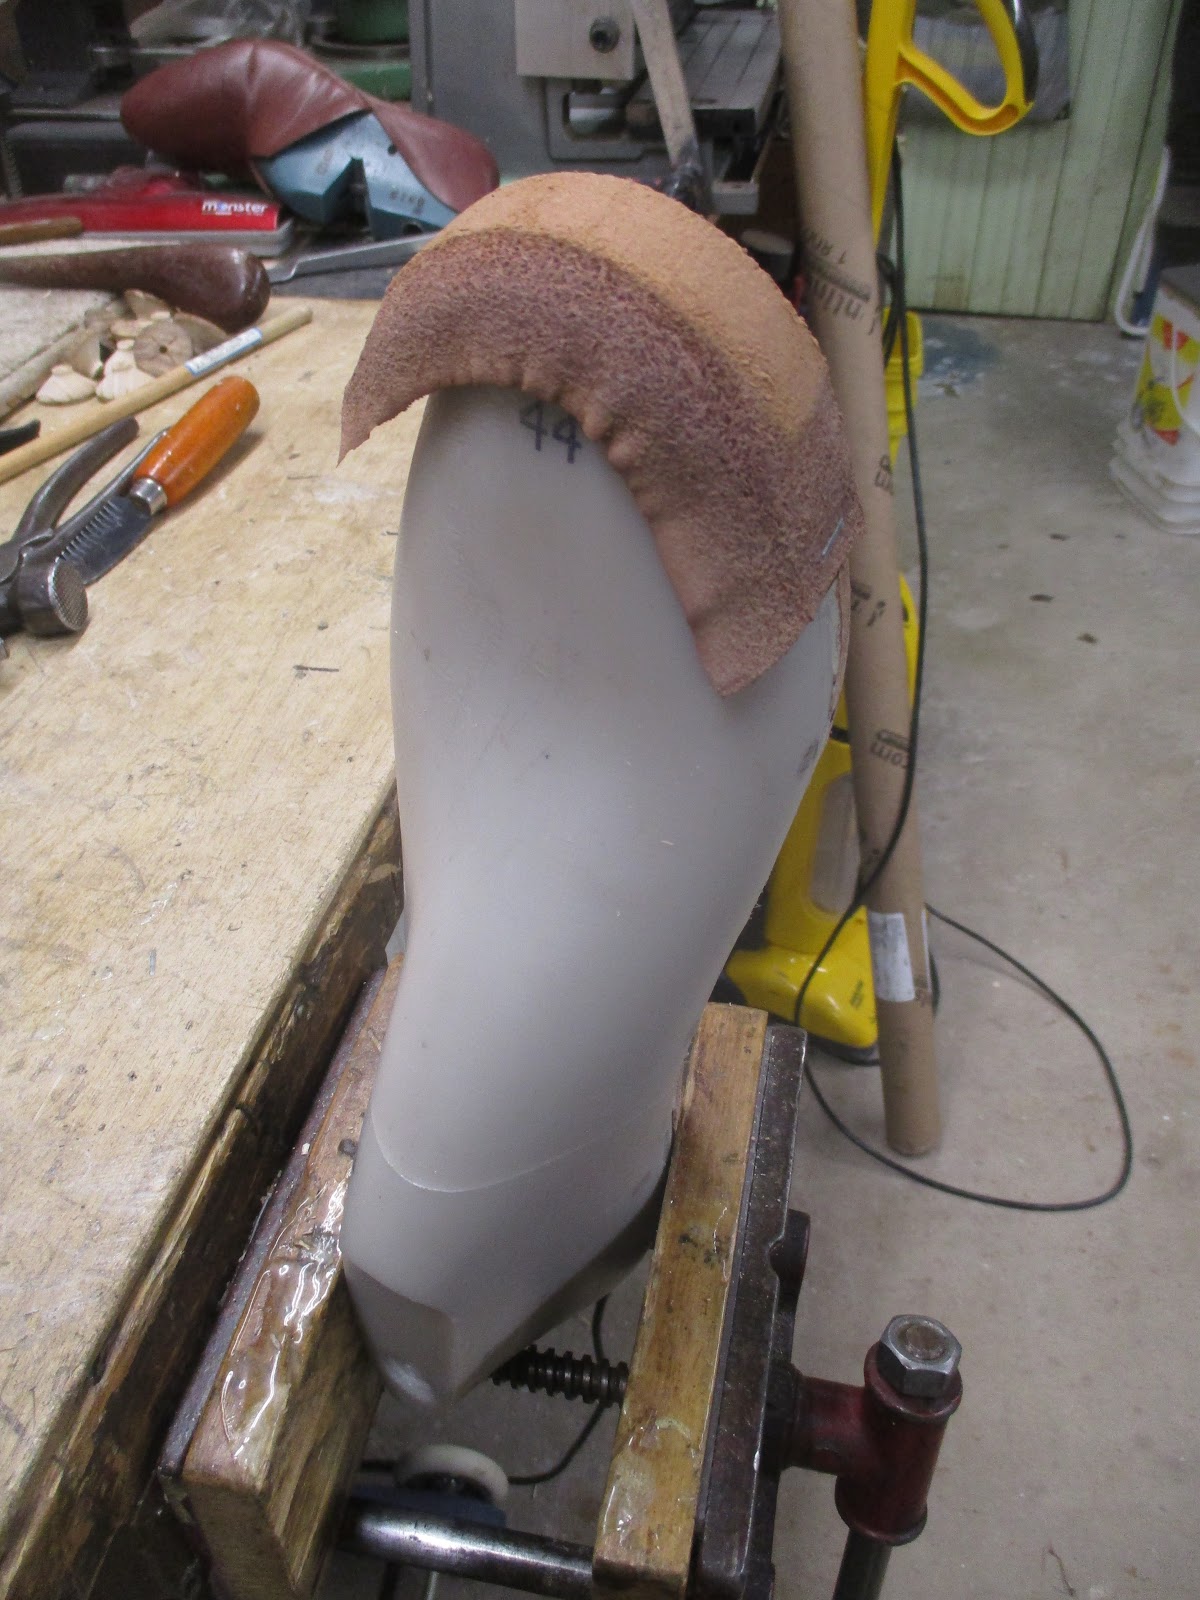
The real trick here is to use the stretch tape.
The stretch tape is a constant force over the entire area and also lets the glue dry over night.


With the tape removed forming can start
When you use your belt sander keep the leather wet
"Feathering" (auto body repair term) the new into the old is slow and careful; you want a smooth transition without a dip.

After I am happy I use Minwax WATER BASED polyurethane to cote the leather; it soaks into the leather and stabilizes the surface.

Transferring to the other side I will cover later


Men's Sandal 2019 V1

In the never ending quest for the perfect sandal this year I am working on a more layered design.

I am already in the redesign phase for this one but I felt I should document how things went for V1


This is the 6th design iteration and they are comfortable.
However I have not been able to get the velcro strap to work regardless of the type of velcro so I just sewed them closed.


Earlier versions helped prove out the assembly sequence


Initial idea has way too many lining parts!
I am now down to two lining halves with a seam down the middle
Some things you have to do to prove that you don't want to do that!

The trick for lasting when you are planning on velcro is to set the design up to be temporarily sewn together and add the velcro after lasting

I'm now convinced that for a back strap velcro you have to have a turning ring to take the stress; that design will come in 2020